🌿 Your trusted guide to choosing the best garden tools.

Dibber: The Simple Garden Tool That Makes Planting Faster, Straighter and Easier

Picture this. It is a bright spring morning, you are holding a tray of 60 tiny leek seedlings, and your trowel is about to turn a ten-minute job into an hour of digging, wobbling and re-filling. Now picture the same morning with a smooth, pointed stick in your hand: push, twist, drop the seedling in, move on. Sixty perfect holes later, your tea is still warm.
That pointed stick is the dibber, one of the oldest and most underrated tools in any shed. It looks almost too simple to matter, yet gardeners and farmers have relied on it for roughly two thousand years. In this guide you will learn exactly what it is, how it differs from a trowel, which kind suits your garden, and how to use it like someone who has been doing it for decades. We will also cover a few things most guides skip: making your own, using it beyond planting, and the mistakes that quietly ruin seedlings.
Quick question before we start: what are you planting this season, seeds, seedlings, bulbs or potatoes? Keep your answer in mind. By the end you will know exactly which tool and which technique fit it.
want to know about seedling
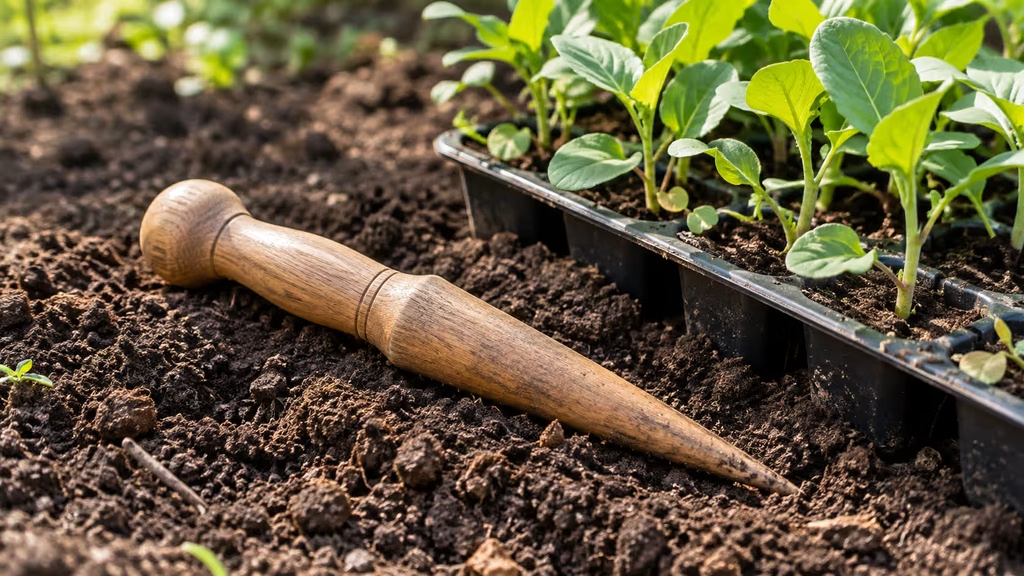
Wooden Tool Ready for Spring Planting
What Is a Dibber?
A dibber (also called a dibble or dibbler) is a hand-held garden tool with a pointed tip at one end and a handle at the other. Its single job is to make a neat, uniform hole in the soil so you can place a seed, seedling, cutting or small bulb exactly where you want it. You push the tip into the ground, twist slightly, pull it out, and the hole is ready.
Historians trace the tool back to Roman times, and the basic design has barely changed since. Early versions were simply sharpened sticks or deer antlers. Later, craftsmen fitted iron tips, shaped comfortable handles and produced specialised forms for forestry and potato growing. Today you can buy one made of beech, ash, bamboo, stainless steel or moulded plastic, and some come with depth markings printed along the shaft.
So why does a pointed stick still earn its place? Three reasons:
- Consistency. Every hole has the same width and depth, which gives seedlings an even start.
- Speed. One push-and-twist replaces several trowel scoops.
- Gentleness. Because the hole is cut into firm soil rather than dug out, tiny roots sit snugly against undisturbed ground instead of floating in loose, air-filled soil.
If you have ever wondered whether you really need one, the honest answer is that you can plant without it, but you will plant better and faster with it, especially once you are handling more than a dozen plants at a time.
Dibber vs Other Planting Tools: How Do They Compare?
New gardeners often ask why they should not simply use a trowel. This table shows where each tool shines.
| Tool | Best for | Hole shape | Speed for many plants | Soil disturbance |
|---|---|---|---|---|
| This tool | Seedlings, small bulbs, seed drills, leeks, onion sets | Narrow, round, deep | Very fast | Low |
| Hand trowel | Larger plants, shrubs, perennials, weeding | Wide, shallow scoop | Slow | High |
| Bulb planter | Large bulbs such as daffodils and tulips | Wide, cylindrical plug | Medium | Medium |
| Widger | Lifting and pricking out tiny seedlings | None (lifts plants) | Medium | Low |
| Pencil or cane | Emergency substitute | Thin, shallow | Fast, but less precise | Low |
The takeaway: a trowel is a digger, while this tool is a hole-maker. If you grow in rows, in modules, or in raised beds, the second job comes up far more often than the first. Many experienced growers keep both and reach for each at the right moment.
Anatomy: What You Are Actually Holding
Understanding the parts helps you judge quality before you buy.
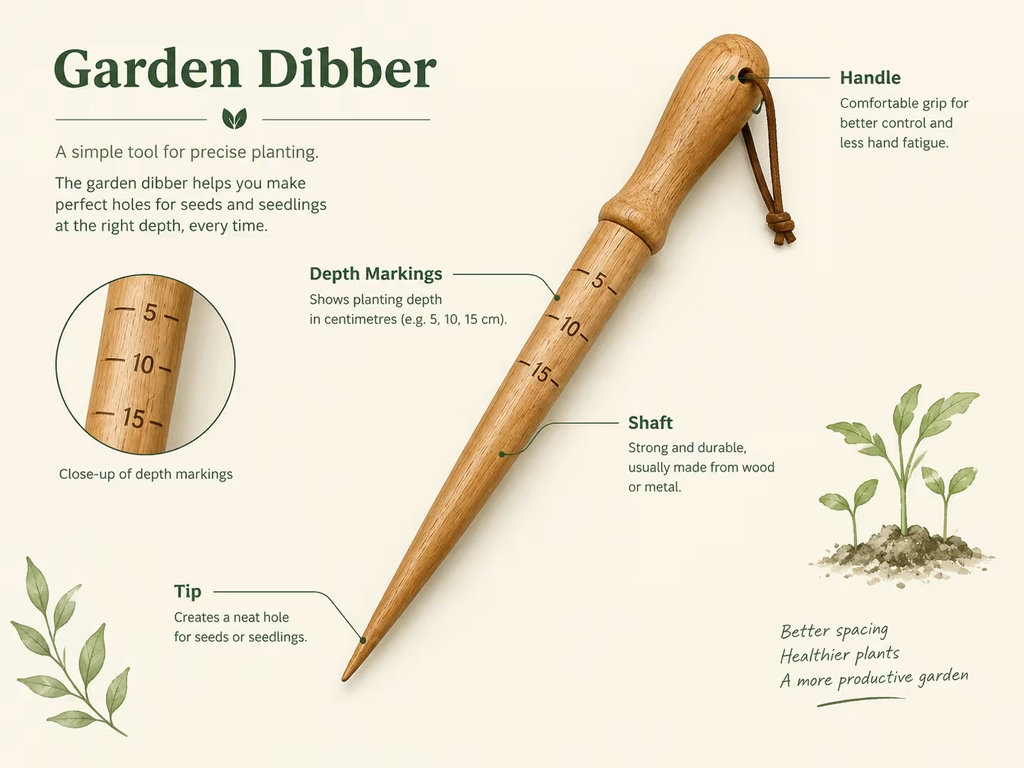
- Tip. Usually rounded or tapered. A blunt tip pushes soil aside gently, while a sharper one pierces firmer ground. Some wooden models have a brass or steel cap to prevent wear.
- Shaft. The working length, typically 15 to 30 cm for hand use. Thin shafts suit seeds and cuttings, thicker ones suit bulbs and potatoes.
- Depth markings. Printed or engraved rings, often in centimetres or inches. They remove the guesswork when sowing at specific depths.
- Handle. T-shaped, L-shaped, D-shaped, straight, or offset. The handle decides how comfortable the tool feels after 100 holes.
- Hanging loop or hole. A small detail that keeps the tool dry and easy to find.
- Material. Wood is warm and traditional, stainless steel cuts through soil cleanly and resists rust, bamboo is light, and plastic is cheap and weatherproof.
Heading: Parts of a Garden Tool Explained
What Is a Dibber Used For? More Than You Might Expect
Most people stop at “making holes”, but this humble tool has a surprisingly long job list.
- Sowing seeds in individual holes. Large seeds such as beans, peas, sweetcorn and sunflowers go neatly into evenly spaced holes.
- Making shallow drills. Drag the tip along a string line to create a straight furrow for carrots, radishes or lettuce.
- Transplanting seedlings. Perfect for leeks, brassicas, lettuce, onions and tomato plugs. A slim seedling version is ideal for module-sized plugs.
- Planting small bulbs. Crocus, snowdrops, grape hyacinth and bulb-sized onion sets drop easily into a narrow hole.
- Planting cuttings. Make the hole first so the delicate stem is never scraped against rough soil.
- Potatoes. A thick potato version opens a hole in loose ground in seconds.
- Marking spacing. Many have measurement rings that double as a ruler for spacing rows.
- Weeding stubborn taproots. Push the tip alongside a dandelion root, twist to loosen, then lift.
- Aerating small pots and containers. Poke a few holes so water and air can reach compacted roots.
- Creating watering channels. A deep hole beside thirsty plants sends water straight to the root zone.
The wide range of uses is one reason experienced gardeners describe it as a tool that quietly pays for itself.
Who Should Use One?
This tool is a smart purchase for:
- Vegetable growers and allotment holders who transplant leeks, brassicas and onions in bulk.
- Container and balcony gardeners who want tidy planting holes without making a mess.
- Parents and teachers running school garden projects, since children can use it safely and it gives satisfying, instant results.
- Gardeners with sore wrists or backs. Long-handled versions let you plant while standing.
- Spring bulb planters who want a quick way to place small bulbs without churning up the lawn edge.
- Flower growers transplanting plugs of annuals into borders.
If you only ever plant three shrubs a year, a trowel may be enough. But once you grow from seed, this tool becomes hard to live without.
Types of Dibbers: Which One Fits Your Garden?
Wooden dibber
The classic. Usually made from beech or ash, it feels warm in the hand and looks handsome hanging in a shed. It is affordable, light and gentle on tender roots. The trade-off is that untreated wood can crack or rot if left outdoors, so regular care matters.
Stainless steel
Strong, smooth and rust-resistant, steel slides through firm soil with almost no resistance. Many include depth markings. It lasts for decades but costs more and can feel cold in winter.
Seedling dibber
This version has a slim, rounded tip sized for the plugs found in modules and small pots. The narrow shape protects fragile roots and fits closely packed trays, which is why it is popular for pricking out.
Seed dibber
This one is designed to make shallow, evenly spaced holes for sowing. Some have two or more prongs, or a row of pegs, so a whole row can be marked in one press. These are brilliant for large sowing jobs.
Potato and bulb dibbers
Thicker and sometimes shaped like a cone, these make the wider holes that tubers and larger bulbs need.
Long-handled
Taller shafts mean you stay upright while planting. If you have knee or back trouble, this style is worth the extra cost.
Forester’s version
A bigger, wedge-shaped tool used to plant young trees and hedging whips. The wide blade pushes through soil while keeping the taproot straight.
Multi-tool sets
Some sets bundle this tool with a widger and small trowel. They are convenient for beginners, though standalone tools usually offer better quality at the same price.
Wooden, Steel and Long-Handled Types Compared

Table of Contents
How to Choose the Right One: A 6-Step Checklist
- Match the job. Planting seedlings or cuttings? Choose a slim tip. Planting bulbs or potatoes? Choose a thicker one.
- Pick the material. Wood for comfort and tradition, steel for durability, bamboo or plastic for budget and light weight.
- Test the handle. An L-shaped or offset handle spreads pressure across your palm, which matters when making hundreds of holes. A simple straight handle works for occasional use.
- Look for depth markings. They are not essential, but they make accurate sowing much easier, especially for beginners.
- Check the length. Short for pots and trays, medium for beds, long for standing work.
- Consider your soil. Light, loose soil works with almost any tool. Heavier clay needs a firm steel tip and a sturdy shaft.
Pro tip: if you are unsure, start with a medium-length wooden or steel model with a comfortable handle. It handles most vegetable and flower jobs, and you can add a specialist later.
How to Use a Dibber Step by Step
Using this tool is easy, but small details make a big difference.
- Prepare the soil. Rake the bed level and remove stones. The ground should be moist but not waterlogged. Water the area the day before if it is very dry.
- Mark your spacing. Use a string line or measure with a ruler or the markings on the shaft. Check the seed packet for recommended spacing.
- Push the tip straight down. Hold the tool vertically and push to the depth you need. For seedlings, aim for a hole slightly deeper than the root ball.
- Give it a gentle twist. A quarter-turn widens the hole slightly and prevents soil from sticking to the sides.
- Lift it out. Pull straight up so the walls of the hole stay intact.
- Place the plant or seed. Lower the seedling by its leaf, never the stem, until the roots sit comfortably. For seeds, drop in one or two, depending on the variety.
- Firm the soil. Reinsert the tool a short distance away at an angle and lever it gently toward the plant to close the hole around the roots. Alternatively, press the soil with your fingers.
- Water in well. A gentle watering settles the soil, removes air pockets and helps the roots establish.
Step-by-Step Planting a Seedling with a Dibber

Recommended Depth and Spacing at a Glance
| Crop or plant | Hole depth | Spacing | Notes |
|---|---|---|---|
| Leeks | 15 cm | 15 cm | Drop seedling in; water to fill the hole, do not backfill |
| Onion sets | 2.5 cm | 10 cm | Leave the tip showing |
| Peas and beans | 4 to 5 cm | 7 to 10 cm | Sow two per hole |
| Lettuce plugs | Root-ball depth | 25 cm | Firm gently |
| Brassicas (cabbage, kale) | Up to first true leaves | 45 cm | Firm well for stability |
| Crocus, snowdrop bulbs | 5 to 8 cm | 5 to 8 cm | Pointed end up |
| Sweetcorn | 2.5 to 4 cm | 35 cm | Plant in blocks |
These are general guides. Always check your seed packet or local advice, as conditions vary by climate and variety.
Real-World Planting Scenarios (Pick the One That Matches Yours)
“I’m transplanting 40 leeks.” Use a thick tool to make 15 cm holes, drop each leek in, and fill the holes with water rather than soil. The leek’s stem blanches naturally and grows long and white.
“I’m sowing carrots.” Skip the holes. Use the tip or the side of the shaft to draw a shallow drill along a string line, sow thinly, and cover.
“I’m planting bulbs in a lawn edge.” A narrow tool lets you lift less turf and replace it neatly, leaving minimal evidence that you were ever there.
“I’m filling a seed tray.” Use a fine, slim tip, make evenly spaced holes in compost, and sow one seed per hole. This avoids thinning later.
“My knees hurt.” Switch to a long-handled model and plant standing up.
Which one sounds like you? Try it on a small patch first, then scale up.
DIY Dibber: Make Your Own in 10 Minutes
You do not have to buy one. A handmade version works just as well and can be customised.
What you need: an old spade or fork handle, a hand saw, sandpaper, a marker pen or rubber bands, and linseed oil (optional).
- Cut a section 20 to 30 cm long from the handle.
- Sharpen one end to a smooth, rounded point with sandpaper or a sharp knife. Take care to keep the point blunt enough not to splinter.
- Mark depth rings in 2.5 cm steps with a pen, or slide rubber bands onto the shaft.
- Sand the whole piece smooth, especially the handle end.
- Rub in a little linseed oil to protect the wood.
Emergency alternatives: a pencil, a pen, a garden cane, or the handle of a trowel can mimic the effect for tiny jobs, although none of them offers the comfort or strength of a proper tool.
Maintenance and Care: Keep It Working for Decades
A good tool can outlive its owner with just a few minutes of care.
- Wipe it clean after use. Dry soil is hard on wood and promotes rust on steel.
- Dry thoroughly. Never store it wet. Moisture is the main enemy of any wooden tool.
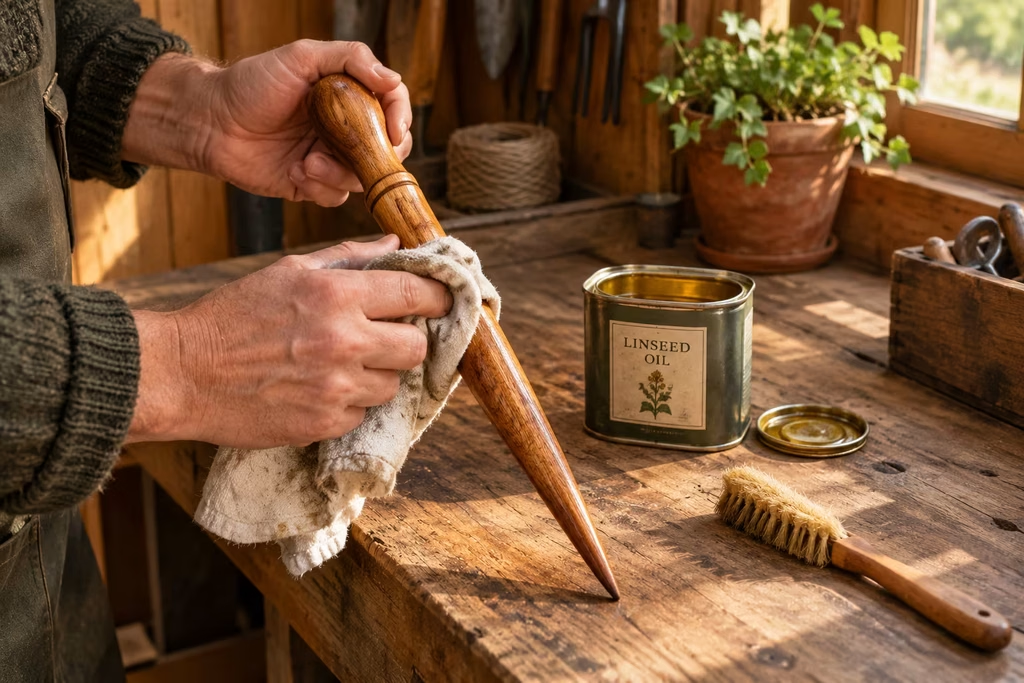
- Oil the wood once or twice a year. Boiled linseed oil keeps the grain from drying and cracking.
- Wipe steel with an oily rag. A light coating of vegetable or machine oil prevents rust spots.
- Sand rough patches. Splinters and rough edges damage roots and hands.
- Hang it up. Use the hanging loop or a hook so it does not sit on a damp floor.
- Disinfect between crops. If you handle diseased plants, wipe the tip with a diluted household disinfectant to avoid spreading problems.
- Check for cracks. A cracked handle can fail under pressure. Replace or repair promptly.
Cleaning and Oiling Your Tool After the Season
Common Mistakes to Avoid
- Using it in hard, compacted soil. The tip will bend, slip or snap. Loosen heavy ground first or water it well.
- Pushing too deep for seeds. Tiny seeds buried too far struggle to germinate. Follow the packet.
- Leaving air pockets. If the hole is not firmed in or watered, roots dry out. Always close and water.
- Forcing a thick plant into a thin hole. Use a wider tool or enlarge the hole with a twist.
- Gripping seedlings by the stem. Hold the leaf instead. Stems are delicate and cannot regrow.
- Glazing the hole walls in wet clay. Working very wet clay can smooth the sides into a hard shell that roots cannot penetrate. Wait for the soil to dry a little or rough up the sides.
- Skipping depth control. Without markings, holes vary and plants grow unevenly. Mark your tool or use a ruler.
- Neglecting storage. Leaving the tool outside all winter shortens its life.
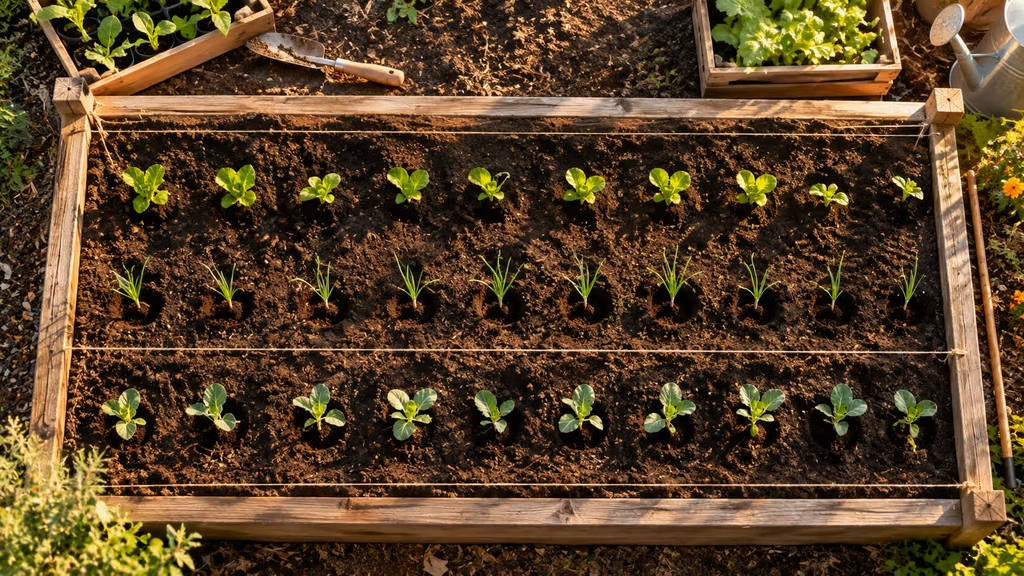
Dibbing Perfect Rows for a Productive Vegetable Bed
Dibber History and Name: Where Did This Tool Come From?
The word comes from “dibble”, an old English verb meaning to make a hole or to dip. Roman farmers are often credited with early versions, and medieval gardeners used sharpened wooden pegs, sometimes tipped with iron, to plant beans, peas and cereal seed in rows. By the eighteenth and nineteenth centuries, garden manuals described several regional forms: the common garden pattern, a potato pattern, and a larger planter’s pattern for forestry work. Some of these made two or more holes at once, which shows how much thought went into saving labour long before electric tools existed.
That long history is useful for a practical reason. A design that survives this long usually does so because it works, costs little and is easy to repair.
Unusual Uses Most Guides Skip
Once you own one, you will start finding extra jobs for it:
- Straight drills in small beds. Lay a string line, then drag the tip along it at a steady depth.
- Pot aeration. Gentle holes around the edge of a compacted container let water soak in.
- Spacing ruler. Mark rings every 5 cm and press the shaft along a row to place plants without a tape measure.
- Root-loosening before lifting. Push the tip beside a bulb or root crop and rock it slightly to ease it out without slicing it.
- Tagging planting spots. Leave a hole open, drop in a label, and you have a marker that survives rain.
- Mini irrigation points. A deep hole next to a tomato or courgette plant directs water to the root zone and cuts down on surface run-off.
Buying Tips: Getting Good Value Without Overspending
Prices range from a few dollars for a plastic model to a premium for forged steel or hand-turned hardwood. Before you buy, run through these quick checks:
- Weight in the hand. It should feel balanced, not tip-heavy.
- Finish. Wooden surfaces should be smooth with no splinters. Steel should have no sharp burrs where the tip meets the shaft.
- Handle fit. Try a gentle push against a table. If the handle bites into your palm, move on.
- Warranty and reviews. Established garden-tool makers often back their products for years, and honest reviews mention how a tool performs after one full season rather than one afternoon.
- Sustainability. Look for wood from certified or well-managed sources, or choose long-lasting metal that will not need replacing.
A good beginner budget is a mid-priced, medium-length tool you will actually enjoy using. A cheap one that snaps in the first month is the costliest choice of all.
Frequently Asked Questions
What is a dibber used for in the garden?
It makes uniform holes for seeds, seedlings, cuttings and small bulbs. It also creates seed drills, marks spacing and can help loosen weeds.
Is a garden dibber better than a trowel?
Neither is universally better. A trowel digs and moves soil, while this one punches clean holes quickly. For transplanting many small plants, it is faster and less disruptive.
What size should I buy?
Choose a slim tip (around 1 to 2 cm) for seeds and cuttings and a thicker one (around 3 to 5 cm) for bulbs and potatoes. A medium model suits most vegetable beds.
Can I use it in clay soil?
Yes, but loosen the soil or water it a day beforehand. A strong stainless steel tip works best. Avoid using it when clay is very wet or rock hard.
What is the difference between a dibber and a widger?
A widger is a flat, spatula-like tool for lifting seedlings out of trays. The other makes the hole they go into. Many gardeners use them together.
What can I use if I do not have one?
A pencil, cane, or the handle of a trowel can work for small jobs. For larger planting sessions, a proper tool is more comfortable and accurate.
Are wooden dibbers better than metal ones?
Wood is lighter, warmer and cheaper, while steel is tougher and easier to push through firm soil. Choose according to soil type and budget.
Can children use one?
Yes. It is one of the safest garden tools for kids because it has no cutting edge. Supervise younger children and choose a rounded tip.
How deep should I plant with it?
It depends on the plant. As a rule, seeds go about two to three times their own width deep, while seedlings go to the same depth they were growing at, or slightly deeper for leggy brassicas and tomatoes.
How do I clean and store it?
Wipe off soil, dry it completely, oil wood or steel lightly, and hang it in a dry shed.
Final Thoughts
Not every garden tool needs a motor, a battery or a complicated manual. Sometimes the best one is a smooth, pointed piece of wood or steel that does one job brilliantly. Whether you choose a classic wooden model, a rust-proof steel one, or a slim version built for delicate plugs, you will notice the difference the first time you plant a full row without bending over, wasting compost or bruising a single root.
Start small: pick one crop this week, set out a string line, and try the push-twist-lift rhythm. Once you feel how quickly the rows fill up, you will understand why this tool has survived two thousand years of garden fashion.
Your turn: which crop will you plant first, and which style are you leaning towards? Share your plans in the comments below, and tell us any tips you have discovered along the way.