🌿 Your trusted guide to choosing the best garden tools.

Draw Hoe: The Complete Guide to This Classic Garden Tool

raw Hoe
Ever stood in a garden aisle staring at a wall of hoes, wondering which one actually does what you need? You’re not alone. Among all the hoe styles out there, the draw hoe is one of the oldest, most versatile, and most misunderstood tools in the shed. If you’ve ever wanted a single tool that can chop weeds, hill up soil, dig a shallow trench, and shape a seedbed — all without switching implements — this guide is for you.
By the end of this article, you’ll know exactly what a draw hoe is, how it’s different from other hoes, how to use it properly (without wrecking your back), how to pick the right one for your garden, and how to keep it working for decades. Let’s dig in.
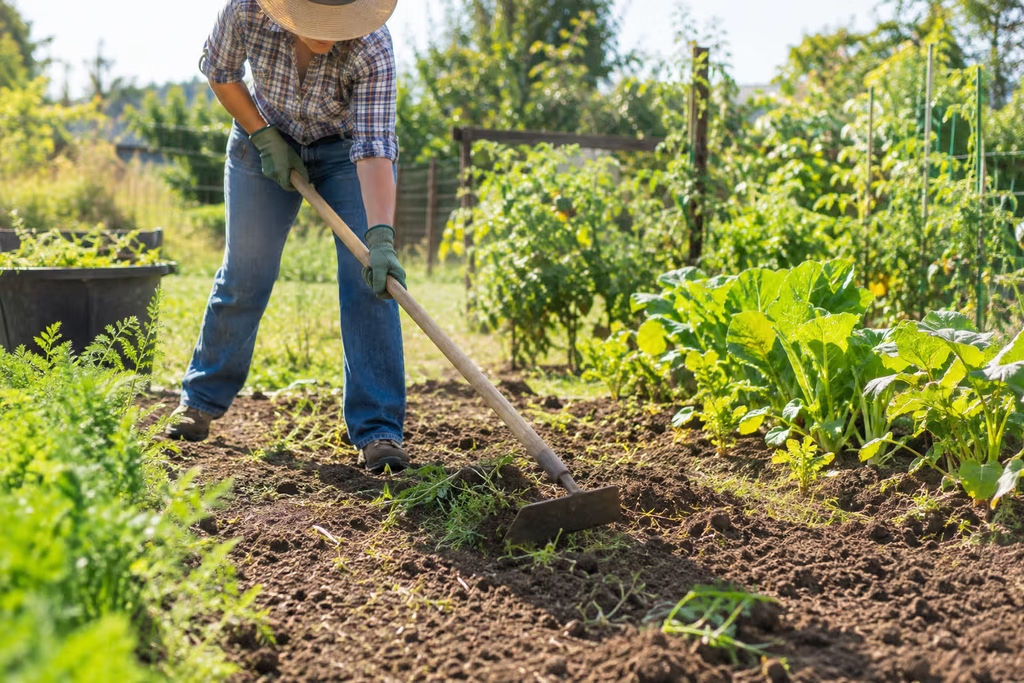
A Draw Hoe at Work in the Garden
What Is a Draw Hoe?
A draw hoe is a hand tool with a flat, rectangular (or slightly curved) metal blade attached at a right angle to a long wooden handle. Unlike a push hoe, which you push away from your body, a draw hoe is used by pulling the blade toward you — hence the name “draw.” This pulling motion lets you chop into the soil and drag weeds, debris, or loose earth back with each stroke.
The draw hoe is considered one of the most traditional hoe designs, dating back centuries in European and Asian farming traditions. Farmers and gardeners still favor it today because a single tool can:
- Slice through weeds at the root
- Create furrows for planting seeds
- Hill soil up around potatoes, corn, or other root crops
- Break up light crusted soil
- Cultivate between rows without disturbing plant roots too much
Because the blade angle and the pulling motion give you strong leverage close to your body, a draw hoe is especially good for precision work — closer to plants, in tight rows, or in raised beds where a wide push hoe just won’t fit.
want to know about shed
Draw Hoe vs. Other Common Names
You may see “draw hoe” used interchangeably with a few related terms, so it helps to know the overlap:
- Chop hoe – emphasizes the chopping motion; often refers to the same basic tool
- Grub hoe – usually a heavier-duty cousin, meant for grubbing out roots and rocks rather than fine cultivation
- Eye hoe – refers to how the blade is attached (through an “eye” socket) rather than the working style, but many eye hoes are used as draw hoes
Knowing these overlaps helps when you’re shopping online, since retailers aren’t always consistent with naming.
Draw Hoe Compared to Other Hoe
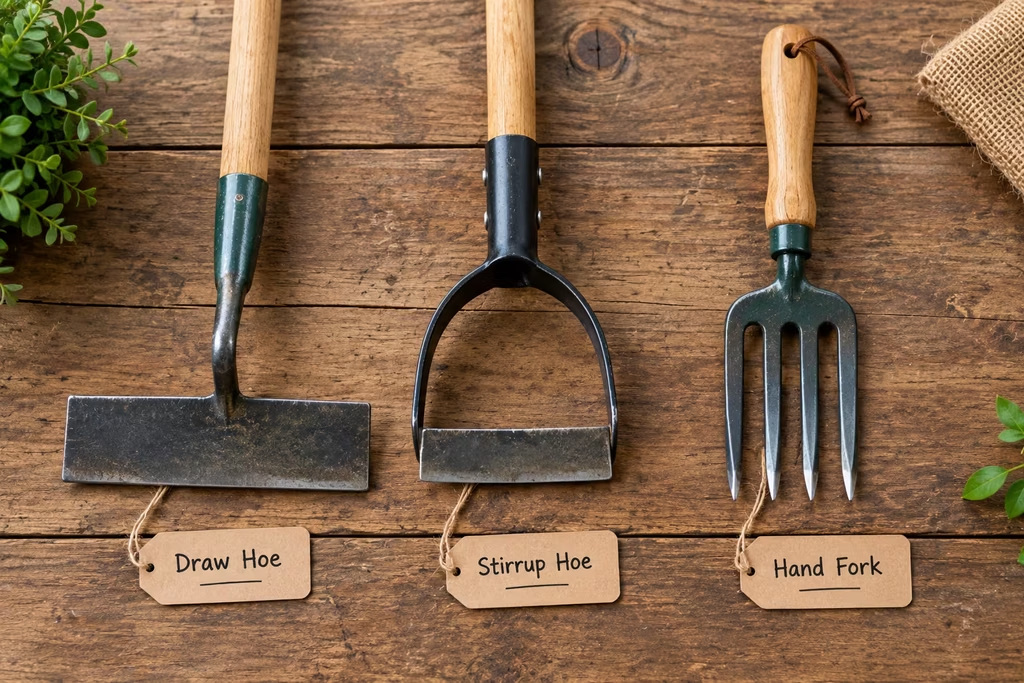
Draw Hoe vs. Related Garden Tools
Not sure whether a draw hoe is the right pick for your garden? Here’s how it stacks up against the tools people most often compare it to.
| Feature | Draw Hoe | Push (Dutch) Hoe | Stirrup Hoe | Mattock |
|---|---|---|---|---|
| Motion | Pulled toward you | Pushed away from you | Pushed and pulled | Swung down/chopped |
| Best for | Weeding, furrowing, hilling | Shallow surface weeding | Fast weeding of larger areas | Digging, root removal |
| Blade shape | Flat rectangle, angled | Flat, in-line with handle | Looped/stirrup-shaped | Adze + pick head |
| Precision | High, good near plants | Moderate | Low to moderate | Low |
| Physical effort | Moderate | Low | Low | High |
| Beginner friendly | Yes | Yes | Yes | Less so |
The draw hoe wins when you need control and versatility in one tool. The stirrup hoe wins on speed for open ground. The mattock wins when you’re breaking new, compacted, or rocky soil.
Anatomy of a Draw Hoe
Understanding the parts helps you buy smarter and use the tool more effectively.
- Blade – the flat metal working edge, usually steel, ranging from 4 to 8 inches wide
- Shoulder/neck – the bent section connecting the blade to the handle at roughly a 90-degree angle
- Eye or socket – the fitting where the handle inserts into the head
- Handle – typically wood (ash or hickory) or fiberglass, 4 to 5 feet long for standing use
- Ferrule or rivet – the metal band or pin that secures the handle to the head
- Cutting edge – the sharpened front edge of the blade that does the actual slicing
A well-balanced draw hoe feels light in the swing but solid on contact — that balance comes from the ratio between blade weight and handle length.
What Is a Draw Hoe Used For?
The draw hoe earns its place in the shed because it handles several jobs that would otherwise need separate tools:
- Weeding – chopping and dragging weeds out at the root, especially in rows
- Furrowing – pulling a shallow trench for sowing seeds like carrots, beans, or lettuce
- Hilling – mounding soil up around potato plants, leeks, or corn stalks
- Cultivating – breaking up the top layer of soil to improve aeration and water absorption
- Edging – cutting a clean line along garden beds or paths
- Light trenching – digging narrow channels for drip irrigation lines or edging material
Who Should Use a Draw Hoe?
This tool isn’t just for commercial farmers — it fits a surprising range of gardeners:
- Vegetable gardeners who need to weed and furrow rows without damaging nearby seedlings
- Raised bed gardeners who want precision in a confined space
- Homesteaders growing potatoes, onions, or corn that need regular hilling
- New gardeners looking for one multi-purpose tool instead of buying five specialized ones
- Older or smaller-framed gardeners who benefit from the pulling motion, which uses body weight more efficiently than pushing or swinging
If your garden mostly consists of container plants or a small flower bed, a draw hoe might be more tool than you need — a hand trowel or hand fork could suffice. But for anyone with row crops or a working vegetable patch, it’s hard to beat.
Picking the Right Handle Length
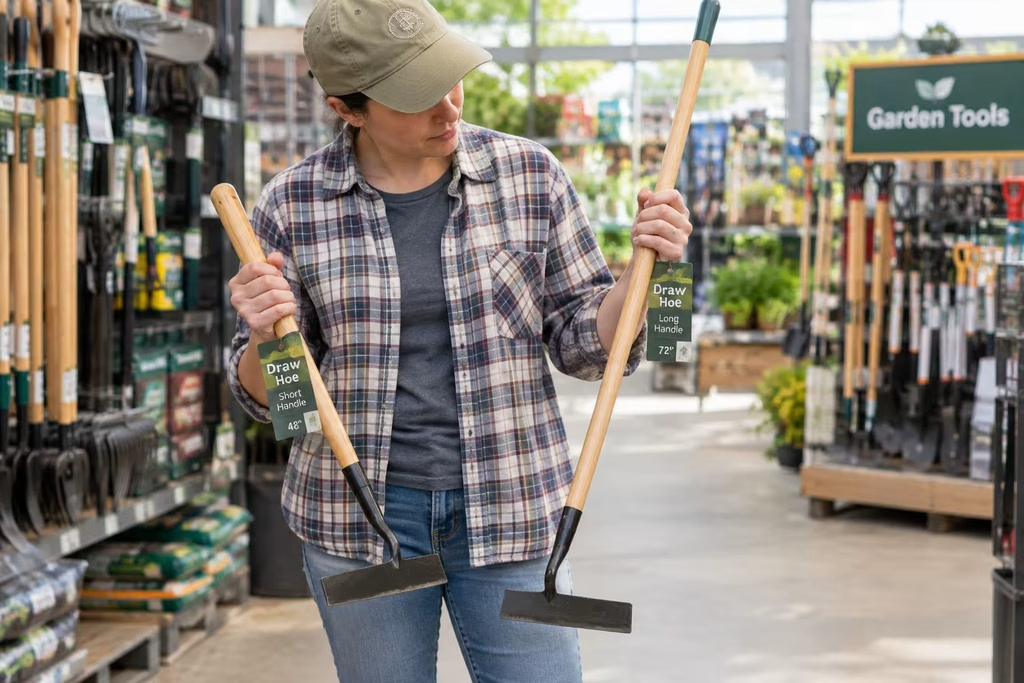
How to Choose the Right Draw Hoe
- Match handle length to your height. Stand the hoe upright — the top of the handle should reach somewhere between your hip and chest for comfortable, upright use without excessive bending.
- Check the blade width for your rows. Narrower blades (4–5 inches) suit tight raised beds; wider blades (6–8 inches) cover ground faster in open plots.
- Choose the handle material. Wood (ash or hickory) offers classic feel and some shock absorption; fiberglass is more weather-resistant and low-maintenance.
- Inspect the attachment point. A solid riveted or forged connection between blade and handle will outlast a cheap press-fit joint.
- Consider blade steel quality. Carbon steel holds an edge well and is easy to resharpen; stainless steel resists rust with slightly less edge retention.
- Test the weight balance if possible. Pick it up and mimic a pulling motion — it should feel controlled, not top-heavy or handle-light.
- Factor in your soil type. Heavier clay soil benefits from a slightly heavier blade with a sharper angle; sandy or loamy soil works fine with a lighter design.
How to Use a Draw Hoe (Step-by-Step)
Many gardeners already own a draw hoe but aren’t using it efficiently. Here’s the correct technique — this also answers one of the most common searches people have: how to draw a hoe through soil properly for the best result.
- Stand with feet shoulder-width apart, facing the direction you’ll be working, with the row or bed in front of you.
- Grip the handle with one hand near the top and one hand about a third of the way down for leverage.
- Position the blade flat against the soil surface a short distance in front of your feet.
- Pull the hoe toward you in a smooth, controlled motion, letting the blade edge slice just under the soil surface.
- Lift and reset the blade after each stroke rather than dragging it continuously — this keeps cuts clean and prevents fatigue.
- Work in short rows or sections, moving backward as you go so you’re always working on undisturbed ground ahead of you.
- For furrowing, use repeated shallow pulls along a string line to create an even, straight trench.
- For hilling, angle the blade slightly and pull soil from both sides of the row inward toward the base of the plants.
- Rinse and check the blade periodically during long sessions to keep the cutting edge free of caked soil, which dulls performance.
Keep your strokes short and controlled rather than long and forceful — a draw hoe rewards technique over brute strength.
Maintenance and Care
A little upkeep keeps a draw hoe sharp, rust-free, and ready for years of use:
- Wipe the blade clean of soil and moisture after every use
- Sharpen the cutting edge with a flat file once or twice per season
- Apply a light coat of oil to the blade before long-term storage to prevent rust
- Sand and re-oil a wooden handle if it starts to feel rough or dry
- Store the tool hanging or upright, off the ground, away from direct rain
- Check the head-to-handle joint periodically and tighten or replace rivets if loose
Common Mistakes to Avoid
- Using a dull blade – forces you to work harder and tear rather than cut through soil and weed roots
- Choosing the wrong handle length – causes excessive bending and back strain over time
- Chopping too deep – disturbs plant roots and brings up unwanted subsoil
- Storing it wet – leads to rust on the blade and rot at the wooden handle’s socket
- Using it as a digging tool – a draw hoe isn’t built for deep digging; use a spade or mattock instead
- Forcing it through compacted or rocky soil – can bend the blade or loosen the head; break up hard ground first with a different tool
Frequently Asked Questions
What is the difference between a draw hoe and a push hoe? A draw hoe is pulled toward the user to chop and drag soil or weeds, while a push hoe (Dutch hoe) is pushed forward with a slicing action just under the surface. Draw hoes generally offer more control for hilling and furrowing.
Can a draw hoe be used for digging? It can handle shallow trenching and loosening topsoil, but it isn’t designed for deep digging. For that, a spade, digging fork, or mattock is a better choice.
What is the best handle length for a draw hoe? A good rule of thumb is a handle that reaches between your hip and chest when standing the tool upright — this varies by height but generally falls between 48 and 60 inches.
How often should I sharpen a draw hoe? For regular garden use, sharpening once or twice per growing season keeps the edge effective. Heavy or frequent use may call for more frequent touch-ups.
Is a draw hoe good for beginners? Yes. It’s one of the more intuitive hoe designs to learn, and its versatility means beginners can use one tool for multiple early gardening tasks instead of investing in several specialized ones.
Where can I buy a draw hoe? Draw hoes are widely available at garden centers, hardware stores like Lowe’s and Home Depot, and online retailers specializing in gardening tools.
Final Thoughts
The draw hoe might not be flashy, but it’s one of those tools that quietly earns its spot in the shed year after year. Once you get the pulling motion right, you’ll find yourself reaching for it constantly — for weeding, furrowing, hilling, and the dozen small jobs that come up in any working garden. Pick one that matches your height and soil type, keep the blade sharp, and it’ll likely outla